|
|
Post by Buckskin Billy on Jun 26, 2009 12:17:39 GMT -5
that sounds about right for me, but i'm not on no horse and i'm dragging deer instead of elk.
mine have been wet up pass the knee's a few time. they don't even look like braintan no more they look more like leather.
i'm not the best seamster in the world and i'm sure that has alittle to do with it. but in the high stress areas i have the pants doubled and reenforced.
mine have never been wased in the washing machine but have been washed in the beaver ponds a few times ;D
i would love some leasons in sewing 101, cuz i really don't have a clue. just kind of a hit and miss thing for me. like evrything else i do
|
|
|
|
Post by intothewest1836 on Jun 29, 2009 21:59:55 GMT -5
after all the work the last few days I got my breeches sewn up and now to cut fringe. how is the best way to cut ?
|
|
|
|
Post by Buckskin Billy on Jun 29, 2009 22:42:49 GMT -5
i use a sharp pair of scissors. pull the hide to be cut into fringe tight and start slashing away. it's been my understanding that in the west, the fringe was cut long and thin. in my opinion that would be a personal choice.
hope you'll have some pictures to share soon
|
|
|
|
Post by Buckskin Billy on Jun 29, 2009 22:45:31 GMT -5
if you want that twisted fringe look. wet the fringe and just twist and allow to dry twisted. another way is to wet fringe with aloe and twist and let dry. i've never tried the aloe but have seen some buckskin fringe twisted this way
|
|
|
|
Post by intothewest1836 on Jun 30, 2009 17:09:25 GMT -5
bought a pair of scissors now to cut fringe hope i got enough of fringie some of it is 2 foot long. I mite cut back later. dont no about twist fringe what does it look like?
|
|
|
|
Post by Buckskin Billy on Jun 30, 2009 17:55:45 GMT -5
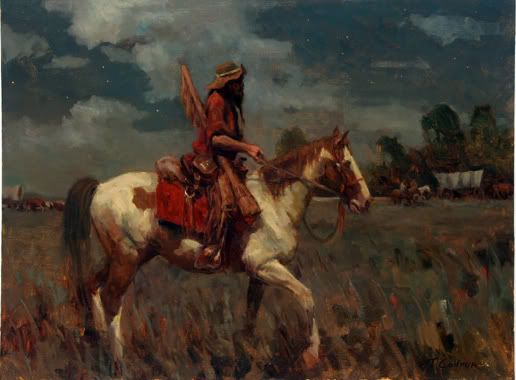
this is the only picture i could think of with twisted fringe. it is a bag i made for my brother from another mother red thunder. i like the twisted fringe look. but i think it is mostly a native thing. meaning i don't know how many of the original trappers did this. all we have to go by is painting and how do you paint a picture of a twisted fringe? any how this should give you a idea 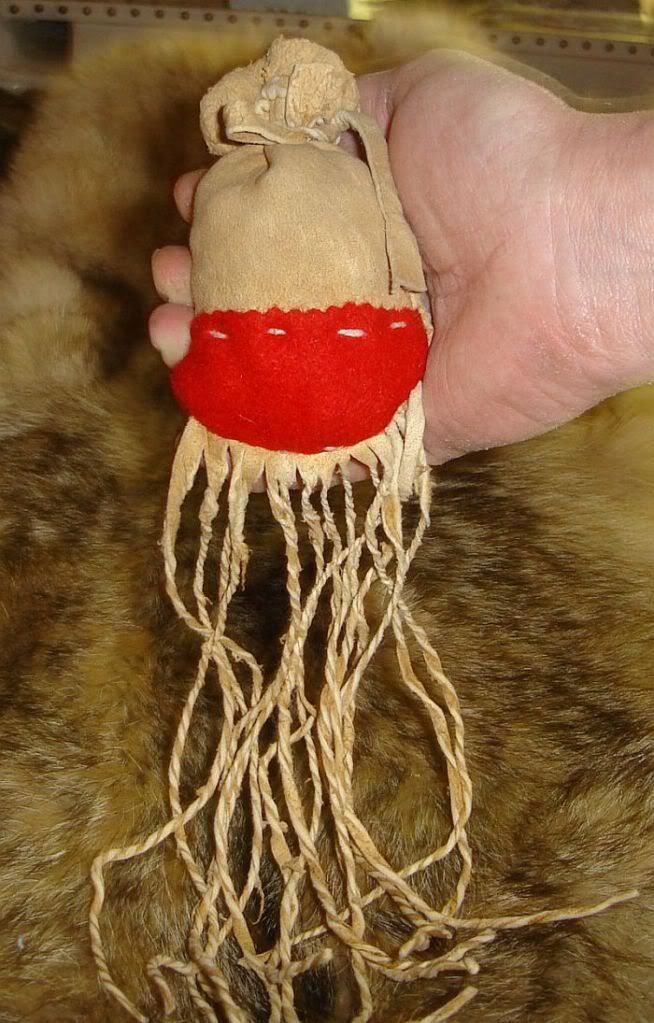 |
|
|
|
Post by paweaver on Jul 2, 2009 18:51:49 GMT -5
Ok. Thanks I get the picture now. In my defense, I am not hard on clothes other than staining them (which I do a lot) and putting the knees out on them. Then I just patch or cut off and move on. Since my braintan pants are knee length they do not get heavy wear in the winter. Billy, some of my boys pants have that look to the bottom of them before I wash them. After washing they seem to come back softer. I think the biggest enemy of braintan is consist wet conditions. This is what caused them to rot for the Lewis and Clark expedition. I read accounts of people having the same braintan shirt for years. I am not hard bound to using our braintan in a re-creation of styles or items of the past. I've never made a pair of drop front pants. I can give you ideas from what I've heard, read, and know about sewing from having to sew my own clothes as a teen. Mom had a fabric shop and I was allowed to pick out any material as long as I sewed it up. Maybe I'll be preaching to the choir and you are already doing these things. I've talked to others who sew reenactment clothing they all talk about heavily wetting the braintan down and restretching it super tight and letting it dry that way before cutting out their pants pattern on it. They only talk about this when making pants. According to them it will help with the stretching problem. Also most waist bands have something in them which today we call interfacing. This is a non stretching piece of fabric that is in the inside of the waist band and is not seen. Today most people use a white iron on interfacing, but you can use any fabric that is the same weight or lighter than the fabric you are making the pants from. If I was to make drop front pants and I was trying to make them time period correct. I would use a scrap piece of heavy linen or cotton inside the waist band and then sew it in so that it would help keep the leather from stretching. Usually this piece is the same shape as the waist band, only about one quarter inch smaller all the way around than the actual waist band piece would be. It can be sewn in place by a row of stitches about 1/4 to 1/2 in from the edge of the finished waist band. I personally would tack (sew) in place the non stretch fabric before I got that far. I have not done this for our clothing mainly because most are made in a hurry the night before or the very day that we need them. Procrastination! This is where having a back ground in sewing helps me out. I also tend to keep it very simple. Draw string waist or leather strap tied around the waist and than folded down.
Sorry it took me so long to answer, I been busy wrapping up the school year and turning in the paperwork for the school system here.
weaverpa
beauro,
I've also read accounts of people stripping out of their clothing to cross the stream just so they didn't have to deal with the problem of wet clothing later. This probably was not the most practical some times and not done for shallow crossings.
|
|
|
|
Post by Cody ( The Patriot ) on Jul 2, 2009 20:31:52 GMT -5
Seems I remember that Liver-Eating Johnson and his new bride stripped down in a rain storm to keep their clothes dry .
|
|
|
|
Post by Buckskin Billy on Jul 2, 2009 21:17:19 GMT -5
thanks for the tips pa weaver. i read about doing the waist band with fabric, but like you said , i thought i was in too much of a hurry and chose not to. the next pair i will sew that waist band fabric in.
i hope them younguns all got good grades and ain't got no summer school to worry with
|
|
|
|
Post by paweaver on Jul 2, 2009 22:48:05 GMT -5
Actually, some bead workers use muslin cotton as a backing for their bead work because it keeps the leather from stretching. Again this has been documented because some of the old bead work is done this way. It is just like everything else each person goes about it in his own way. Just for fun. I thought I'd share these. Look at the strap dress in the first picture. It was worn until it was out grown. Took straps off and made it the skirt that you see in the next picture. At one children's festival she helped with huge chalk drawing in it. It had a pink, purple, and red cast to it for a while. Check out the last picture. Son out grew his pants and daughter wanted a fuller skirt to run in. So I cut the skirt up the middle and put in a 3 inch square gusset for the crotch and sewed the legs shut. I've cut his pants apart and now how two sleeves for a shirt for one of the boys. Frankly, I feel people years ago did the very same thing. I might be more accurate than I know. ;D    |
|
|
|
Post by beaudro on Jul 3, 2009 6:49:18 GMT -5
Good pictures Weaver, nice family you got. I thought I did say I use a cotton interfacing, although I probably said waistband. And it is period correct, you can line the complete artical if you wish. Many of the older tailor made breeches were made this way. Mine are lined in the waistband with a hemp/cotton blend, documented from the boone family. I shouldn't say my breeches stretch, i should use the word "abuse" instead. If I wore mine to regular ole rendezvous they would do just fine and I would probably have them for several years. Mine are constantly getting wet, both knee breeches and pants. Instead of a saddle I should say Epishimore, it's a little rougher on the leather than a comfortable saddle. My newest pair of pantaloons are almost japanned in blood and have been wet more times than dry as long as they are on me. It's almost a sad situation to go through this much brain tan. After 3 or 4 days the knees start to bulge, they look funny even, then the thighs are stretched, and even with a reinforced waistband it still stretches out , probably from bending over so much while wet. Many times before I lay out my pattern I will wet the buckskin down and let it draw up in those necessary places, then prepare to cut it out. That should be done with most buckskin in my opinion. It would just depend on what i'm going to do with it. A good quill worker I know does this before any work is applied.
I'm aware of the muslin backing on beadwork, but i've never seen it done on quill embroidery, several times I've seen poorly done beadwork fall apart because of the leather either stretching or shrinking. I've been warned that the embroidery should be done in the proper direction on the buckskin too. Katie York tells me that I should just use real sinew and do it the right way, when it gets wet it will get soft and and then dry with the leather and not have as much problems. Nymo and other threads common to modern beadworkers doesn't expand when wet , of course the beadwork has to be sewn right in the first place, some don't go deep enough, and that can pop.
For the abuse, and wear that I give my buckskin pants there's no use in beading it , my coat? yes, i would love to quill the whole thing in Metis fashion... but i gotta get real good first.
|
|
|
|
Post by bamaman on Jul 3, 2009 8:14:11 GMT -5
to the original poster... one thing that is key when cutting fringe is to use a pair of nice scissors. If you are like me you want it long and thin so that it looks the best. I tried the ghinger scissors that everyone I know swears by and I wasn't that impressed. What I did at first that worked really well is to tack my leather to a board and use a razor knife. This is a pretty effective method. I did this for a long time until I asked an Indian friend of mine that has made a ton of stuff for people... he pointed me toward these: www.fantes.com/scissors.htmlThe set at the top of this page with the blue dot is the best pair of scissors I've used. They aren't the most expensive but they will cut leather in a straight line like a crazy man  |
|
|
|
Post by Buckskin Billy on Jul 3, 2009 9:45:52 GMT -5
good looking buckskin family pa. thanks for the tip on the scissors bamamna. i use to have some of those, before i started making buckskins, but lost them one time when i had to move. i used them to cut cleaning patches for my guns and i remember them being sharp and the handles or grip are big enough to hang onto when cutting like a crazy man  |
|
|
|
Post by paskinner on Jul 3, 2009 14:40:06 GMT -5
I just had a couple questions/thoughts on this subject.
Almost any type of leather shrinks and hardens when wet and dry a few times. I always thought of smoking as a light tan, don't know how accurate that is, but seems like it could eventually be washed out, plus you would be washing out the oils every time you get the hide wet.
So, has anyone tryed re-braining and re-smoking their clothing?
You could just add brains and a dash of soap and wash your pants, then put them on when damp and wear them dry, then maybe re smoke them.
Just curious if anyone else thinks this might be helpful?
|
|
|
|
Post by beaudro on Jul 3, 2009 15:41:01 GMT -5
I actually rebrained a pair of pants Pa. It was the first pair I ever made, and they were made out of a hide that I didn't do well enough. The very first hide I ever had I bought from you, while I was in the learning stage of doing my own. I probably drug that hide all over the country showing it off, and many people could not beleive that a buckskin could be so soft. So they will derive an idea that "indians didn't get them this soft" , a self protect mechanism that will provide a person with enough confidence to use a poor hide. I did exactly this same thing, not knowing that in history many of the Indian tanned hides were very well done.
So, in my first attempt, i used 4 hides to make a pair of pants. These hides had only a few good spots in them, most of them were really hard in the neck and other thick areas.
After much effort in sewing and construction I was trying to wear those pants. I had blisters on my legs in a couple of places they were so uncomfortable. So, I got the bright idea to try braining them , mainly the legs. It worked, but they were out of shape and odd looking afterwards. I was happy enough just to be a little more comfortable.
I never really was abusive with these however, I finally cut them up for a gun case and traded that off, the buckskin didn't look too bad because they never got a year of wear into them. It was a good lesson of do it right the first time.
If I get mine wet and wear them until dry, they stay a little softer than hanging them over a fire. but only in the places that move and stretch the most. Much like softening a hide I suppose. But after time it's more like they are being over worked and the fibers are breaking , the leather is losing shape and stretching apart more, finally it's either take them up and make them fit again, or start making a new pair.
One pair I own is made out of elk, it's the worst for losing shape. I wouldn't advise using elk for pants again, it's heavier and being thicker it takes on more water. I thought they would be the best for wear, but it's not happening. I'm thinking deerskin has a better fiber for clothing and the abuse i put it through.
I've noticed my mocs do the same thing, but they wear out too fast to really be a problem. I'm told a few people recommend re-braining moose hide mocs , they probably last long enough to find out if that works.
|
|